Tutorial
In this tutorial, we're going to be utilizing Acala's on-chain scheduler to create an automatic subscription service that awards users for the time they are subscribed. A user can subscribe to this service and every time a certain period passed, the contract will reward them with some tokens.
Setup & Install Dependencies
We will create a project from scratch, build and test it using Waffle. If you'd rather build your smart contracts using Remix, please check out this page.
To start, let's install nodejs and yarn if you haven't already:
sudo apt install -y nodejs

npm install --global yarn
Next, run the following commands in the folder where you want your project to live:
mkdir subscription-contract
cd subscription-contract

yarn init -y
yarn add --dev [email protected]
And add the following script to your package.json:
"build": "waffle"This will create a folder for our project, initialize a new yarn project, and add waffle as a dev dependency. We'll be using waffle to compile our smart contracts.
Within your project folder, create a file called waffle.json and paste the following inside the file:
{
  "compilerType": "solcjs",
  "compilerVersion": "0.6.2",
  "sourceDirectory": "./contracts",
  "outputDirectory": "./build"
}
This file is the configurations for waffle to use when building our smart contracts.
Let's create our contracts folder.
Use Scheduler.sol
Inside the contracts folder create Scheduler.sol paste the following code:
This file describes the scheduler smart contract and what arguments you must supply to it to use it. But how does the scheduler work?
The Acala EVM provides Solidity, Substrate, and Web3 developers a complete full-stack (Acala+EVM+Substrate+WASM) experience seamlessly with a single wallet. Many Substrate and WASM customization are made available inside EVM via pre-compiled contracts, such as on-chain scheduler, bring your own gas, Quality of Service oracle feeds, and more. It allows us to add new features that would be impossible on Ethereum while still letting developers use existing code and tooling to create DApps that leverage these features. These pre-compiled smart contracts have static, known addresses on the Acala EVM making it incredibly easy to use.
Create the Subscription Contract
Let's create our smart contract file by creating a Subscription.sol file within the contracts folder. In it add the following code:
Here you can see we're importing the abstract class that describes the Scheduler smart contract and pointing our scheduler to its address in the constructor. Again, Scheduler is a pre-compiled smart contract with a static address. It will always live on-chain at this address, no need to deploy your own version of it. 
Constructor
Next, let's set some state variables and modify a constructor. Within the contract add the following:
Here we added 6 state variables. Let's go through them one by one:
balanceOf: defines/shows the number of native tokens in a user's balance.period: a period of how many blocks the Scheduler should be called
The constructor is self-explanatory, all it does is set the first state variables for the contract.
Subscribe and Transfer functions
Next let's add the subscribe function:
Here the subscribe function simply adds a user to a list to which tokens will be distributed.
Finally, let's have a look at the arguments of scheduleCall:
Let's break this line down:
address(this)is the address of the smart contract to call, in this case, we are calling the same smart contract that is calling the schedule contractvalue- How much native token to send alone with the call.gas_limit- The gas limit for the call. The corresponding fee will be reserved upfront and refunded after the call.storage_limit- The storage limit for the call. The corresponding fee will be reserved upfront and refunded after the call.min_delayis the number of blocks from now it should try and execute this call (though it could be more!)abi.encodeWithSignature("paySubscribers()")is the function to call within the smart contract (we'll define it next).
For more information on the rest of the arguments being passed to the scheduler contract scroll up to where we created Scheduler.sol.
Pay subscribers
Now let's create the paySubscribers function that the scheduler is calling:
Notice the first line of the function:
What this is saying is that only the contract itself can call this function. When we schedule a call using the Scheduler contract, it is not actually the scheduler calling the function but the function itself. The scheduler is just dispatching the call at a later time.
And that's it! We now have a functioning smart contract with automated subscriptions!
Build
To build the smart contract run the following in the project's root directory:
Deploy
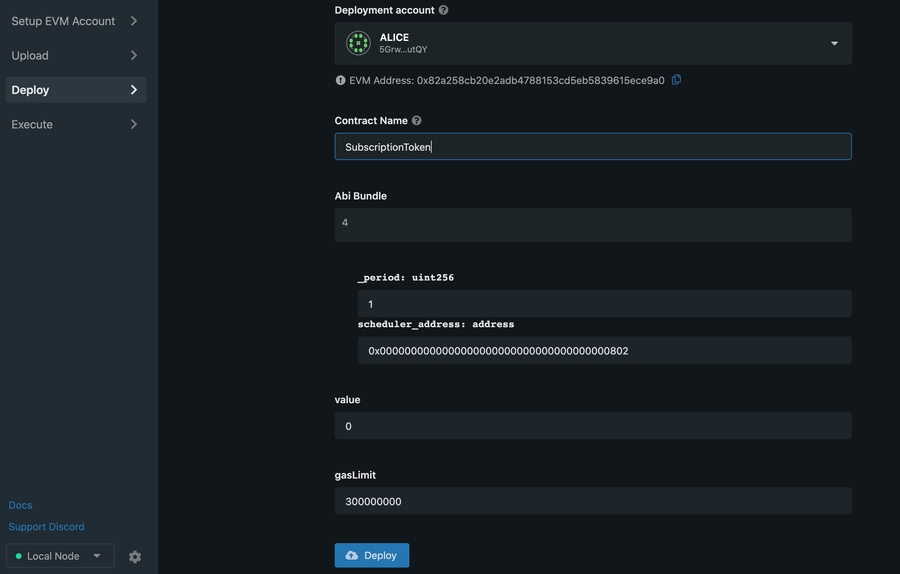
To deploy the smart contract follow the directions here.
You can set a period to 1 (which is ≈6 secs), and find the scheduler address in the list of predeployed contracts.
 When everything is done press deploy.
Executing the contract
the only way is to get this new token is to subscribe to the smart contract. Execute subscribe function and check how balance changes over time for the subscriber (balanceOf function).
Last updated
Was this helpful?